The purpose of this tool is to optimize GIF files within Google Slides to reduce the deck file size and improve loading time.
From a technical standpoint it’s a Node.js server application that makes a copy of the Google Slides Presentation, downloads all it’s GIFs, optimizes them with Gifsicle, hosts the GIFs in an s3 bucket, replaces the optimized GIFs in the presentation and transfers ownership to the user.
Contributions are what make the open source community such an amazing place to learn, inspire, and create. Any contributions you make are greatly appreciated.
If you have a suggestion that would make this better, please fork the repo and create a pull request.
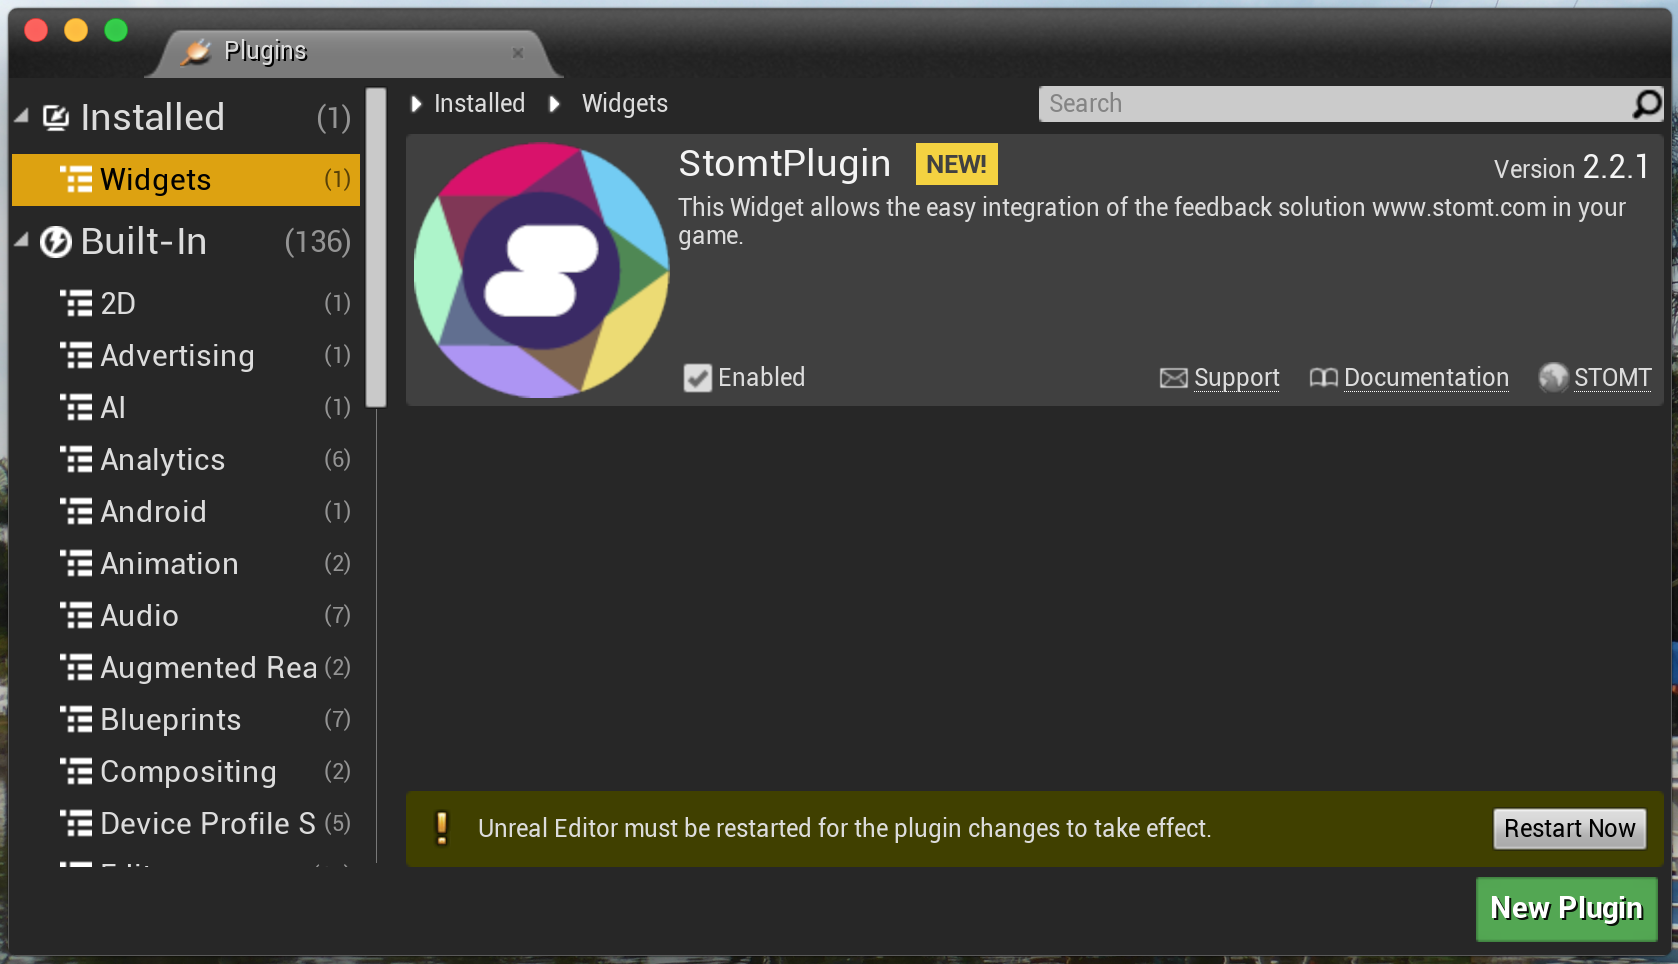
Enable StomtPlugin in your Plugins Window (in Unreal Editor: Edit -> Plugins -> Installed -> Widgets -> StomtPlugin)
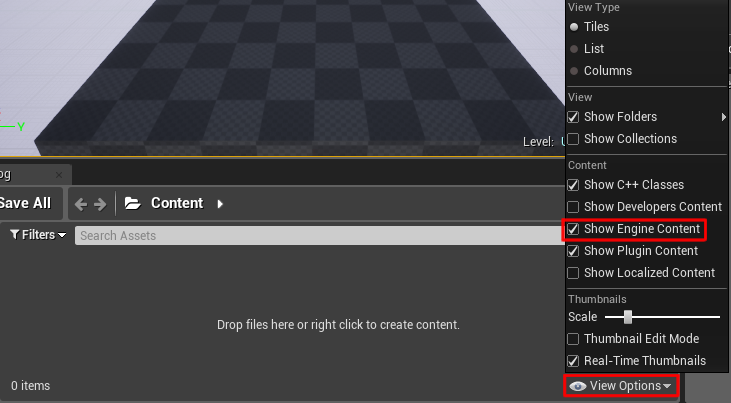
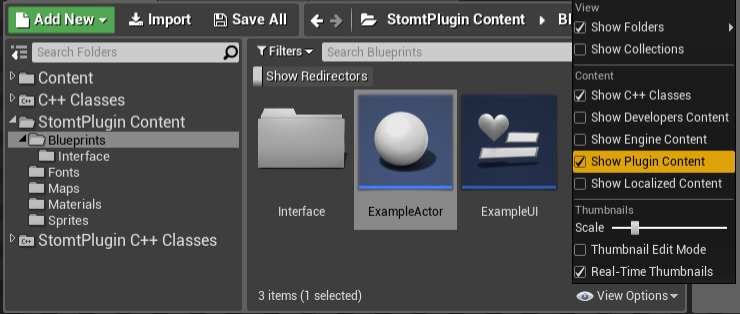
Enable “Show Engine Content” and “Show Plugin Content” in your Content Browser
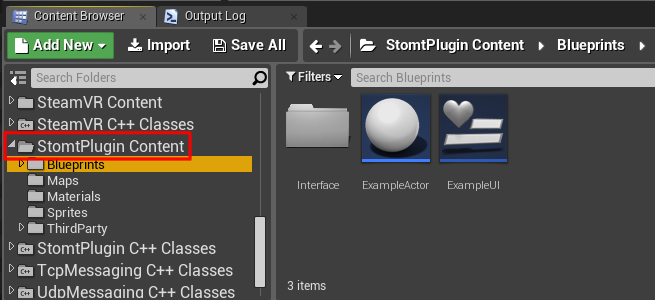
Find StomtPlugin Content
Place the ExampleActor in your scene.
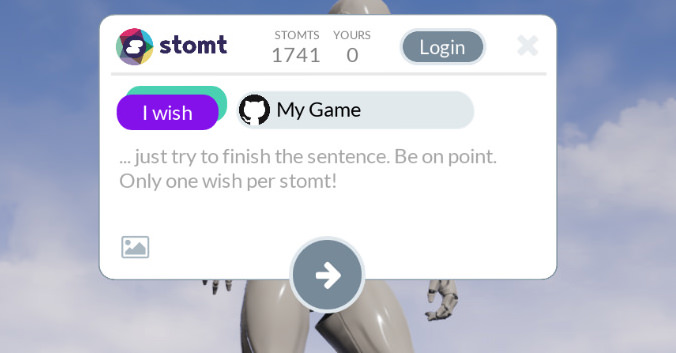
Click play to run the game and show the feedback widget by pressing E.
You should now see the feedback form window in your game. Try to toggle “I wish”https://github.com/”I like” and send a test stomt to “My Game” (The default test target). Then continue with Configuration.
Manual Installation
If you use an older Unreal Engine version please check out the UE/[version] branch.
Clone or download this repository into your projects Plugins directory.
1.2. If you do not use C++ code in project: use the Add New button in the editor and add a blank C++ class to your project.
Guide
Add the StomtPlugin to your projects PublicDependencyModuleNames in the projects build.cs. /Source/[YourProjectName]/[YourProjectName].Build.cs:
Restart Unreal Editor, open your project and enable the plugin. Edit -> Plugins -> Widgets -> StomtPlugin
Check Show Plugin Content and Show Engine Content in the bottom right corner of your editor (view options).
Place the ExampleActor in your scene.
Click play to run the game and show the feedback widget by pressing E.
You should now see the feedback form window in your game. Try to toggle “I wish”https://github.com/”I like” and send a test stomt to “My Game” (The default test target). Then continue with Configuration.
Only show the button to certain players (e.g. power users)
Trigger the form after certain events
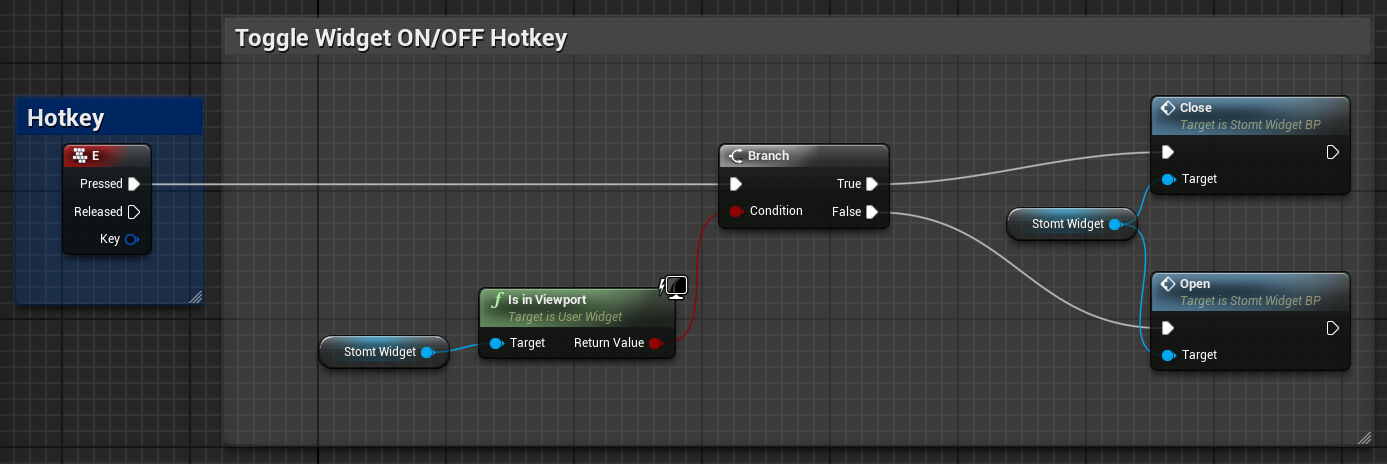
Define a hotkey:
Event-Callbacks
The STOMT Widget supports a variety of callback events.
In-Game Labeling
Labels will help you track down user issues.
Append labels, as for example your game-version or the player position/level. You can either hardcode them in the Unity Inspector or use a script to add them in a flexible way based on the information you have.
Easily add an array of labels
Issues
Don’t hesitate to contact us if you have any issues or need help.
We would love to see you contributing to this project. Please read CONTRIBUTING.md for details on our code of conduct, and the process for submitting pull requests to us.
Visit the project on STOMT to support with your ideas, wishes and feedback.
Enable StomtPlugin in your Plugins Window (in Unreal Editor: Edit -> Plugins -> Installed -> Widgets -> StomtPlugin)
Enable “Show Engine Content” and “Show Plugin Content” in your Content Browser
Find StomtPlugin Content
Place the ExampleActor in your scene.
Click play to run the game and show the feedback widget by pressing E.
You should now see the feedback form window in your game. Try to toggle “I wish”https://github.com/”I like” and send a test stomt to “My Game” (The default test target). Then continue with Configuration.
Manual Installation
If you use an older Unreal Engine version please check out the UE/[version] branch.
Clone or download this repository into your projects Plugins directory.
1.2. If you do not use C++ code in project: use the Add New button in the editor and add a blank C++ class to your project.
Guide
Add the StomtPlugin to your projects PublicDependencyModuleNames in the projects build.cs. /Source/[YourProjectName]/[YourProjectName].Build.cs:
Restart Unreal Editor, open your project and enable the plugin. Edit -> Plugins -> Widgets -> StomtPlugin
Check Show Plugin Content and Show Engine Content in the bottom right corner of your editor (view options).
Place the ExampleActor in your scene.
Click play to run the game and show the feedback widget by pressing E.
You should now see the feedback form window in your game. Try to toggle “I wish”https://github.com/”I like” and send a test stomt to “My Game” (The default test target). Then continue with Configuration.
Only show the button to certain players (e.g. power users)
Trigger the form after certain events
Define a hotkey:
Event-Callbacks
The STOMT Widget supports a variety of callback events.
In-Game Labeling
Labels will help you track down user issues.
Append labels, as for example your game-version or the player position/level. You can either hardcode them in the Unity Inspector or use a script to add them in a flexible way based on the information you have.
Easily add an array of labels
Issues
Don’t hesitate to contact us if you have any issues or need help.
We would love to see you contributing to this project. Please read CONTRIBUTING.md for details on our code of conduct, and the process for submitting pull requests to us.
Visit the project on STOMT to support with your ideas, wishes and feedback.
<ul> and <li> HTML elements can be used in HTML emails, but getting them to
render consistently
takes a little work.
This is a shortcut for these elements. Its output is predictably boring, but
bulletproof (forgive the pun) for email clients:
Not very exciting, but reliably rendered in all email clients.
But you can get more creative. This MJML:
<mj-text><p>
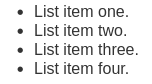
Examples of the custom "mj-list" and "mj-li" tags. Here is a list with an
option set on the entire list:
</p></mj-text><mj-listbackground-color="#ddd"><mj-li>List item one.</mj-li><mj-li>List item two.</mj-li><mj-li>List item three.</mj-li><mj-li>List item four.</mj-li></mj-list><mj-text><p>And here's a list with options set on individual list items:</p></mj-text><mj-list><mj-li>List item one. Lorem ipsum dolor sit amet, sed do eiusmod tempor incididunt
ut labore et dolore magna aliqua.</mj-li><mj-licolor="blue"
>List item two, customized color for the entire list item.</mj-li><mj-li>List item three.</mj-li><mj-libullet-color="red" padding-left="40px"
>List item four, customized bullet color and left padding. Duis aute irure
dolor in reprehenderit in voluptate velit esse cillum dolore eu fugiat nulla
pariatur. Excepteur sint occaecat cupidatat non proident, sunt in culpa qui
officia deserunt mollit anim id est laborum.</mj-li><mj-ligutter="20px">List item five, custom gutter size.</mj-li><mj-li>List item six.</mj-li><mj-litext-color="green"
>List item seven, customized text (only) color. Ut enim ad minim veniam,
quis nostrud exercitation ullamco laboris nisi ut aliquip ex ea commodo
consequat.</mj-li></mj-list>
Will produce the following visual representation:
MJML Head
In your <mj-head> component, you should also add the following:
This will ensure that these lists are properly described as such when the email
is read using assistive technology.
Styling
In addition to setting attributes with the elements options (see below), you can
also modify them through CSS. Use
<mj-style> and target the .list
and .list-item classes.
Edit the component script file in ./components/, then run gulp build or
gulp watch to compile. We include
sheerun/modern-node, which formats and
lints code automatically on commits using Prettier and
ESLint. You can use npm run format and npm run lint
on their own as well.
To run tests, use npm run test
If you want to use a forked version of this component in your emails without
having to publish it to npm, see
premail/mjml-custom-component
for a guide.
Security
Legalese: This component is provided “as is” without any warranty. Use at
your own risk.
For more information and to report security issues, please refer to our
security documentation.
License
mjml-bullet-list is licensed under the GNU Affero General Public License v3.0
or later. To be clear: This license only covers the component’s code, not any
content you generate using it.
For the legal details of the AGPL, see the complete
LICENSE.
    ShadowDrawable shadowDrawable = new ShadowDrawable();
    shadowDrawable.setColor(ContextCompat.getColor(this, R.color.my_blur))    //shadowcolor
            .setOffsetY(DensityUtil.dip2px(this, 5))    //阴影下偏移--offset of the shadow
            .setRadius(DensityUtil.dip2px(this, 8))     //四角半径--concern of the rectangle
            .setEdgeShadowWidth(DensityUtil.dip2px(this, 8))   //四周阴影半径-- the shadow of each edge of the rectangle
            .setFilterColor(0x56ffffff)                 //中间值,越大阴影越接近设置的值-- the slot to said how close to the shadowcolor
            .setTopMargin(DensityUtil.dip2px(this, 3))  //上间距--top margin
            .setParentHeight(DensityUtil.dip2px(this, 200))  //设置要依附的View的高度 -- the height of parent view
            .attach(bg)                                 //要在哪个View上面加阴影-- the shadow parent.REQUIRED
            .build();                                   //显示,必调-- to show the shadow.REQUIRED
Getting start
Gradle
1. Add it in your root build.gradle at the end of repositories:
This the the repository for the CAiSE-2020 accepted long paper “An Approach for Process Model Extraction By Multi-Grained Text Classification“. In this paper, we formalize the PME task into the multi-grained text classification problem, and propose a neural network and the coarse-to-fine (grained) learning mechanism to effectively extract multi-grained procedural knowledge.
Overview
code/
This directory contains the source code of our approach.
data/
This directory contains two datasets used for evaluation.
Datasets
The dataset named as X-Y denotes a text classification task Y on data source X. For two sentence-level tasks — SC (sentence classification) and SSR (sentence semantics recognition), an example <x,y> in each line denotes a sentence x and its label y. each of them can be solely used to evaluate single-sentence classification tasks. For the word-level task — SRL (semantic role labeling), an example <x,i,y> in each line denotes a sentence x, a subordinate word index i and a corresponding label y. It can be further used to evaluate sequential-text classification tasks. We will keep updating them to provide more reliable version(s), including correcting wrongly-annotated labels and adding more training/testing examples. The up-to-date version can be directly downloaded from this repository. In summary:
COR for cooking recipes and MAM for maintenance manuals.
COR-SC.txt is the dataset for sentence-level classification (ST1) to identify whether a sentence is describing an action or a statement. The format is <Sentence, Label>.
COR-SSR.txt is the dataset for sentence-level semantics recognition (ST2) to recognize the semantics of a Statement sentence to control the execution of following actions. The format is <Sentence, Label, Y/N> in which Y denotes the sentence belongs to the label while N not (so, you could ignore all examples with N notations, just focus on the examples with Y notations).
COR-SRL.txt is the dataset for word-level semantic role labeling to assign semantic roles to words in an Action sentence. The format is <Word, Word Postion in the Sentence, Label>.
Reqirements
Python (3.6.8 or 3.7.3)
PyTorch (1.0.1)
Word2Vec. Note that the embedding layer can be replaced by other models such as BERT. If necessary, kindly replace corresponding lines of the code to do so.
Citation
If you find this project helps, please kindly consider citing this paper as:
@inproceedings{MGTC,
  title = {An Approach for Process Model Extraction By Multi-Grained Text Classification},
  author = {Chen Qian and Lijie Wen and Akhil Kumar and Leilei Lin and Li Lin and Zan Zong and Shuang Li and Jianmin Wang},
  booktitle = {Proceedings of The 32nd International Conference on Advanced Information Systems Engineering (CAiSE)},
  year = {2020},
  pages = {268-282}
}
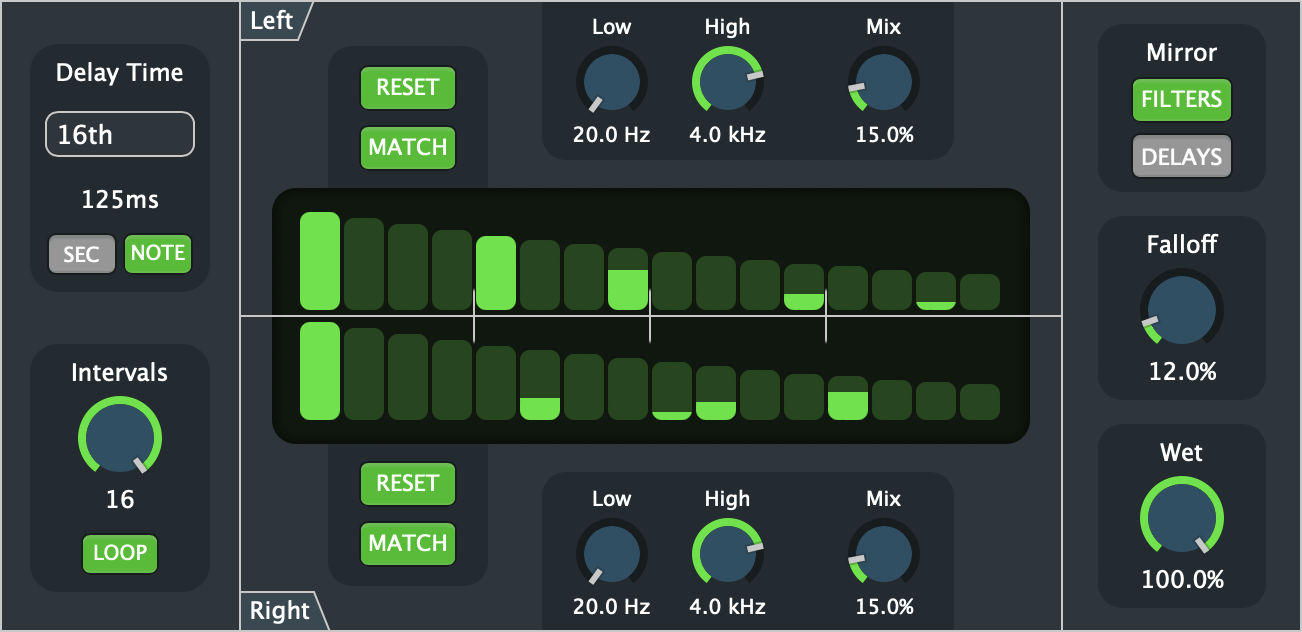
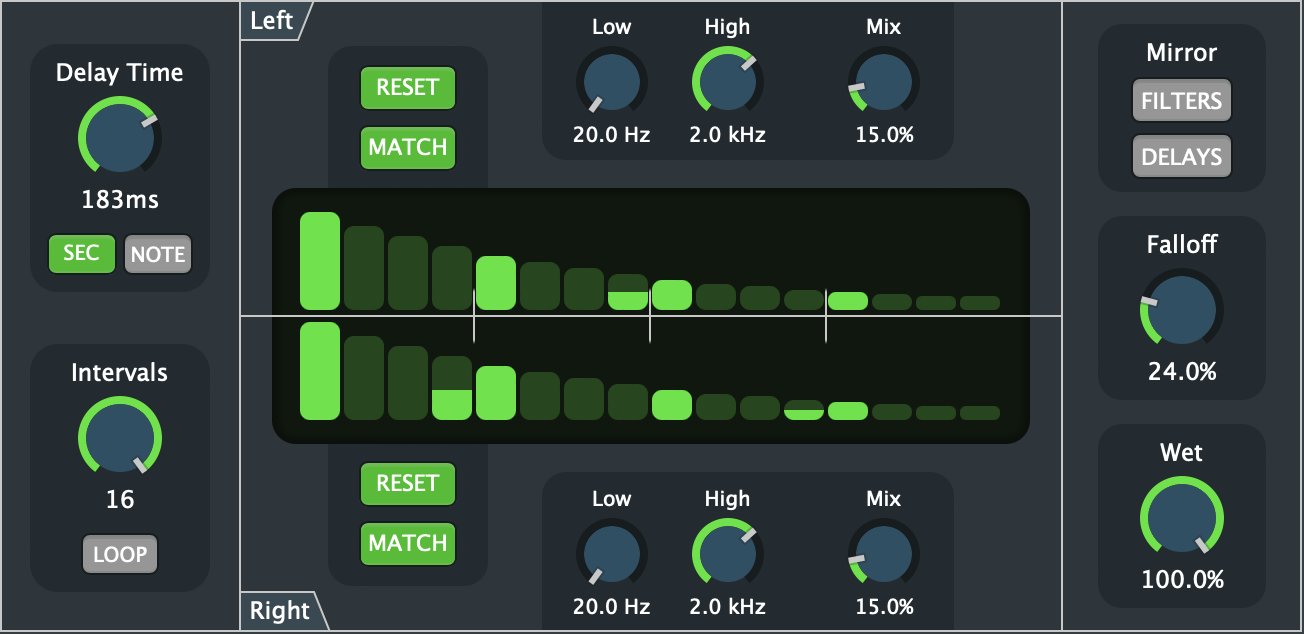
An audio plugin that can create fully customizable delay patterns, with adjustable volume, panning, and interval between repeats. No longer do you have to rely on stereo crossfeed formulae to create the rhythmic delay effect that you want! There are also built-in filters for the delayed sound, and the capability to loop indefinitely. Use this plugin to produce shimmering, bouncing atmospheric effects, or phrenetic, energetic rhythimc patterns. Delay Intervals can be downloaded from the “Releases” section of this repository, or see the Installation Guide to build it from source yourself.
Description
Delay Intervals provides up to 16 stereo “intervals” of delay (the first one being the dry signal), with adjustable delay length and the ability to loop audio from the last interval back into the first one. Delay time between each interval can be synched to the tempo of your DAW, or set independently from 0 to 250 milliseconds. Each interval can have its individual volume adjusted (or muted) for each channel, and audio can be set to fade gradually with each repeat (like partial feedback in a typical delay).
Delay Intervals also provides a 2nd order low-pass and high-pass filter for each channel of audio, that will be applied after each interval. As such, further repeats will be more heavily processed by the filter, and so a mix control is provided to mitigate this. There are also a few “ease of use” controls provided, such as a toggles for setting each channels’ filters and intervals to mirror each other, and buttons to copy the interval settings from one channel to the other.
Install dependencies by running the below command in the same directory (this may take some time)
cmake -S . -B build
Build the plugin by running the below command in the same directory (this may also take some time)
cmake --build build
Plugin files will be located in subfolders of build/plugin/Delay-Intervals_artefacts/ based on plugin format (VST, AU, etc). Choose the one you plan to use and install it as you would any other plugin.
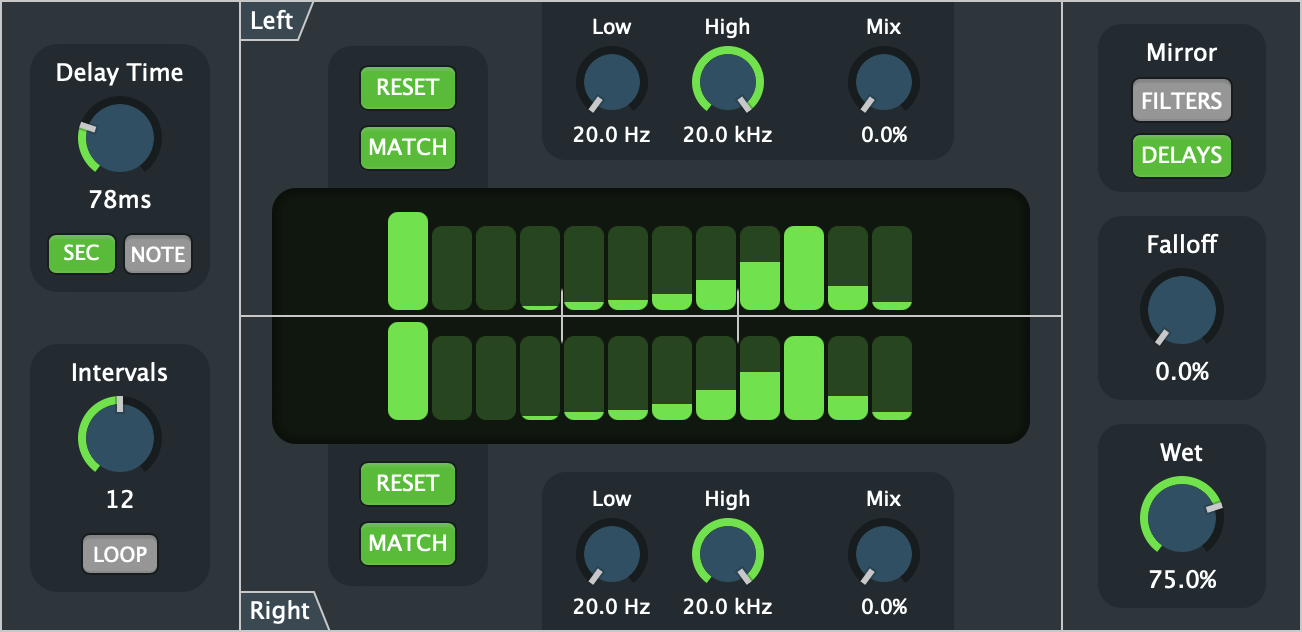
Welcome to the GraphQL workshop for React developers! ☀️
In this workshop, we’ll be building a Twitter clone using GraphQL and React. We’ll be using GraphQL Yoga for the GraphQL server and Apollo Client for the React app.
🌱 Learn GraphQL basics
🥑 Build GraphQL queries & mutations
🥝 Get familiar with the GraphQL client
🍇 Implement queries & mutations on the client
🔑 Access control & authorization
🎛 Production deployment
🔧 Setup
Get started by cloning this repo and installing the dependencies:
git clone https://github.com/glennreyes/react-graphql-workshop.git
cd react-graphql-workshop
pnpm install
Create a query hello that takes an argument name. Based on what the user inputs, return a greeting. For example, if the user inputs Glenn, return Hello Glenn!.


 https://github.com/mediamonks/deck-optimmizer